Build Your Own Smoker – Step By Step Guide
Yes, you can build your own smoker without needing specialist skills like welding and here I'm going to show you how.
I've made three full construction prototypes and countless re-designs to create a homemade smoker that works, is low cost and relatively easy to construct.
Wood is the traditional material used for making a smokehouse and I wanted to keep as close to tradition as possible. Practically speaking, so that anyone can build it with a minimal amount of joinery skills and also from a cost point of view.
Why? Because I have a passion for BBQ & I hate DIY but I've always wanted to build my own smoker so fundamental to the design is that anyone can do it - just very basic carpentry and a bit of common sense.
To keep costs down I've used readily available building materials from my local builders merchant and at all points tried to standardize on those materials. In essence it is a double skin construction with a skeleton of ¾ inch planed square edge battens.
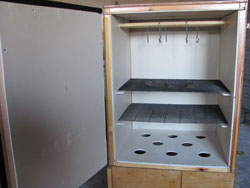
The internals are completely fire retardant following one of my earlier designs (taken from another website) that showed signs of charring after a few cookouts and I'm glad I did because continuing further would have been unsafe. It has to be said that trying to design all the internals to ensure that no wood is exposed is quite a challenge and I'm pleased to say that I made it – even the shelf supports in the food chamber are made of fireproof board.
The full construction is made in sub-assemblies (panels) and using the links at the bottom of the page you can skip from panel to panel and understand more about the process.
A lot of thought and several prototype builds have gone into this design to ensure that it's practical, easy and enjoyable to build your own smoker. Please feel free to click on the links below for more information or if you've already decided that you want to build your own smoker using my design then use this link to go straight through to buy your smoker plans now.
To Build Your Own Smoker Your Will Need To Fabricate These Panels
Fabricating The Smoke Spreader
The Rear Panel
The structure for all the panels is plywood, timber batten and fire proof board. The timber battens are attached specifically to ensure that there's a good fit for the fire proof board to the inside.
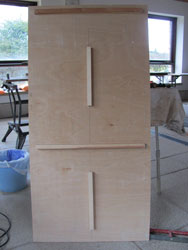
The plywood piece is exactly 48" x 24" making it the easiest piece to cut....especially if you using 4' x 2' pre-cut plywood.
You can see in the picture above that there are four battens fixed to this back panel and all of these battens help secure the fire retardant board in position.
The bits that you need to measure accurately at the positions of the horizontal battens because this ensures that there is a snug fit with the top and side that will butt up to these positions.
The upper and lower central vertical battens will be used to fix the fireproof panel to the rear. It might look a little flimsy at this stage but when the side panels are fixed in position you will see how it all pulls together. Likewise, the exact length and location of these battens isn't that important provided there is enough surface to fix the fire retardant board. If you stick to the measurements it is better because all the drill holes for the fire board will be in the correct position.
Another important point to get right when you build your own smoker is the amount and location of the drill holes because whilst the fixings on this panel look relatively simple many of the more complicated fabrications fix to this panel at some point. All the drill holes are clearly marked and measured in the technical drawings e-book.
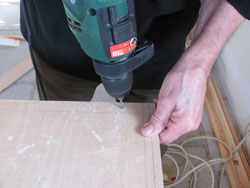
To get the full picture I've prepared this short video. I hope that you enjoy it!
The Side Panels
As with all the panels in my design the battens that are fixed to the plywood make the bearers for both the inner skin, the doors and the rear panel so in terms of fixings, this panel is complicated.
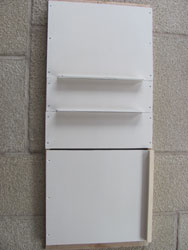
That said, take it step by step and follow the sequence in which all the panels are assembled and you'll walk it.
The plywood is cut to size - I used a jigsaw and a straight edge piece of wood clamped to the plywood to ensure that I got a clean cut.
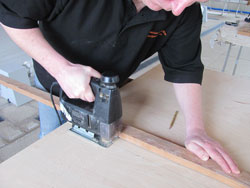
The positioning for the battens that will support the shelves is to be honest a matter of choice, you could also put in an extra shelf if you wanted. I chose to put in two shelves, one for big pieces of meat and one for smaller pieces or a water bath.
The finished shelf is wire mesh that can be removed (just leaving the shelf supports in position so in hindsight, additional shelves would have added extra flexibility without compromise.
Also in the e-book you'll find the design, measurements and a process to fix a couple of lengths of dowel – so that you can hang and smoke fish
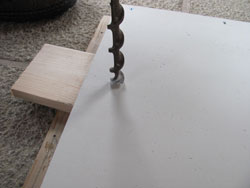
Once the battens are in position and the inner skin panels have been cut out, the first job is to fix the shelf supports into position. You'll need to follow the instructions carefully if you're going to get this right first time.
After the shelf supports, the remainder of the inner skin can be finished. The final pieces of fireproof board that will clad the side walls of the firebox can be fabricated but must not be inserted at this stage otherwise they will foul the insertion of the smoke spreader.
The Base
Getting the dimensions of this panel accurate is vital to the whole construction because this is the foundation for every other piece.
You can see in the picture that once complete, I've sited the base on a few off-cuts of batten, this is simply to raise it away from the floor and this is important in the assembly process.
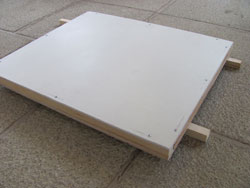
At a later stage I fixed some additional battens to the bottom of the base and four casters to make the whole unit easy to move around.
The Top
This panel slots into the other panels that we've already made – a bit like an inverted top hat, so it is vital to get the measurements correct. There also the complication of the chimney vent and after a lot of careful thought I've come up with something quite novel and easy to fabricate.
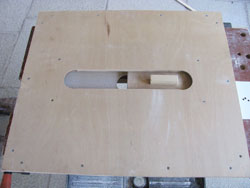
The chimney is one of the most important parts of the design in my view because this provides one of the basic controls of temperature in the food chamber. The air in the firebox will get hot, (hotter than the food chamber) and you can “encourage” that hot air upwards by varying the aperture for the chimney.
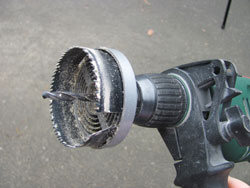
It's not complicated to do, I used a drill attachment to make the holes. The clever bit is in the sequence you use to mark out the position of the holes so that the holes align and the panels fit together.
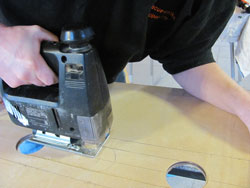
The aperture control slider is simplicity itself and can be made out of off-cuts. The main point to watch is that the thickness and therefore construction of your slider is dependent on the thickness of materials that you use for the inner and outer skin.
There's a full description and explanation of how it works in this video:
The Food Chamber Door
The system that I've used to make the smoke seal on this door really works well both here and on the firebox door.
Whilst the smoke seal principle is the same for the firebox door, it is a completely different panel design so I'll cover that on a separate page.
The first thing to say about getting a good smoke seal is that the door must close securely in the first place and to that end there are a few points to make in terms of the basic design:-
- There's additional batten structure to provide a good foundation to fix basic door hinges. You could argue that it doesn't look pretty but it definitely does the job. Use brass (not plated) fixings to prevent rust.
- You use a similar technique for the snap catches – again brass. These ensure that when the door closes everything remains “under pressure”.
- In the panel design the outer skin is larger than the inner and it's the outer that butts up tight against the edge of the side panel.
- Make sure that the inner skin and positioning of the battens is accurate so that that the door fits snugly into the rest of the shell
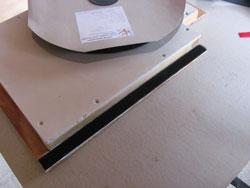
You can give the compression seal further strength by using strips of Velcro loop attached to the door panel.
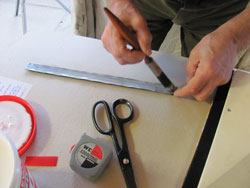
This short video shows how to attach the Velcro loop. To be honest it isn't my best video clip of the series but I hope that it helps you nonetheless.
I have heard about other plans to build your own smoker that use draft excluder strip with a self adhesive backing. Whilst I'm sure that the draft excluder would initially provide a good compression fit I've two reasons not to use it:-
- The self adhesive backing will eventually fail and gluing something to re-apply it if it already has adhesive on doesn't work.
- I'm not convinced that the foam would stand the temperature especially on the seal around the firebox door.
The Fire Box Door
There's a little more work involved in this panel because there's a few cut outs and you have to concentrate to ensure that you countersink in the correct side of each fabrication. It's not challenging technically, it just requires that bit more concentration to follow the instructions in my design.
I'm using a gas burner and most gas burners that I've come across so far have the gas pipe inlet attached to the right hand side of the neck and this presents a problem......
If you want to add some more wood chips during a long cookout, how do you open the door without disturbing the burner or doing anything that could potentially be considered unsafe? After all we are talking about a naked flame here together with a pan full of charred wood.
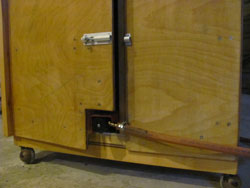
You could have the door separate to the hole for the burner neck but then when you open the door you've got two holes and potentially a draft that could blow out the burner. In addition you'd have to disconnect everything whenever you wanted to remove the burner at the end of every cookout.
Each way I looked I either had the safety problem of disturbing the burner or potentially worse having part of the firebox as exposed wood and create a fire hazard.
The "build your own smoker" project came to halt here for some time but after a lot of thought and a number of re-designs, (I even considered making a drawer) the solution is here for you. Incorporate two panels in the front rather than one. The right hand side is fixed and the left hand side opens and incorporates the breathing hole and peep hole for the burner which means that the opening side isn't fouled by the gas inlet pipe.
The door panel itself follows the same structure as the other panels although positioning of the battens is a little more complicated because the panel isn't symmetrical so you have to work back to front. In addition to the cut out for the peep hole there's also some extra pieces of batten in the middle of the panel to act as a bearer for the fastening bolt to fix onto.
You make the smoke seal has been achieved in exactly the same way as the food chamber door.
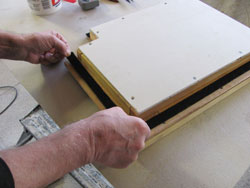
You'll be able to see in this video how to prepare the Velcro loop for the smoke seal and how to adhere it to the door.
One last point to mention is that the door cannot be a snug fit for the internal panel because we have to allow for the swing of the door. This means accurate measurement is a must.
Fire Box Panel
I'm particularly pleased with the design of my home made smoker firebox panel because it adds structure and maintains the fireproof integrity of construction
The firebox panel is fixed in position and provides the structure for the door to open safely without disturbing the burner. In addition the design of the 2 inner skin panels maintains the 100% fireproof lining to the inside of the firebox.
Some dimensions need to be accurately measured whilst others are dependent on the size and style of burner that you have.
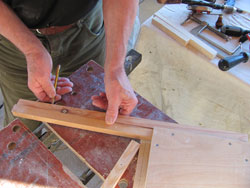
Once you've cut the outer skin to size, the holes can be drilled. The complications arise in the fact that the panels are slightly offset, there are a couple of battens that protrude and the whole thing gets fixed together "back to front". Complicated yes, impossible no, my drawings will ensure that you get it right and countersink the drill holes on the correct side.
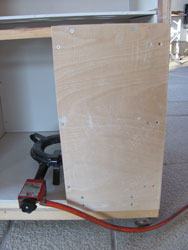
As with all the other panels, here's a short video of how I put it all together:-
The Smoke Spreader
My build your own smoker design includes this smoke spreader which is an important tool to ensure that the smoke is evenly distributed through the food chamber.
It is essentially a perforated sheet of the fire retardent board that is positioned between the smoke box and the food chamber. Rather than the smoke following the upward draft directly, it is forced to go through the perforations (well large holes really) and so move around the food chamber so that every piece of food gets a good dose of smoke no matter where it is positioned in the food chamber.
The smoke spreader is positioned so that there is sufficient distance above the base of the firebox for safety.
Timing of fitting the smoke spreader is important. You've got to put this panel in at the right time and the fixing to different battens dictates that some drill holes are countersunk one side and others on the reverse.
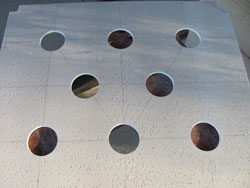
Initially I was very nervous that there would be too much heat from the firebox into the smoke chamber so I only drilled a few holes but I found the reverse to be true. The smoke spreader protected the chamber too well so I drilled some more holes in it and it worked fine. To drill these holes I used a drill attachment like this:
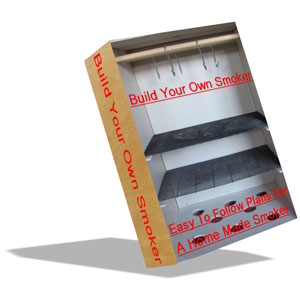
So that's it, those are the component panels that you need to build your own smoker. All the exact measurements together with full work instructions, a bill of materials, tips techniques and more pictures are available in my 58 page e-book which you can buy for $9.95
All proceeds from the book are returned directly towards the running of this site. Is it time for your to build your own smoker?
See Also:-
Barrel Smoker Plans
Build A Brick BBQ
Meat Smokers
Patio Furniture

