- Recipes Home
- Curing Meats
Curing Meats
When you start to read about curing meats it can feel a little daunting, especially when you are told about the dangers of getting it wrong. In this section I will explain the science behind curing and break the process down into simple easy to follow steps.
Following on from that I've also prepared a series of standard cures for you to try and once you've got the hang of curing meats then you'll no doubt want to experiment with your own flavours.
As you read and then move on to trying the process for yourself, remember that there is science and art to curing meats so it's important to document what you've done and build your own recipe book so that you can easily repeat a recipes when you find exactly what you like.
Note: This page covers the basics of curing meats, in particular my main experience has been with pork for bacon and hams as an amateur enthusiast. My assumption therefore is that like me, you'll buy your cuts to be cured ready prepared from the butcher and as such I won't be covering the butchering of the pig.
Curing Is Different To Brining
Many barbecue enthusiasts will have tried brining meat prior to cooking it using my brine recipes and while the headline ingredient in both brining and curing meats is salt, that's where the similarity ends.
Brining uses a liquid of low salt concentration. The salt in a brine denatures the protein sheaths in the muscle tissue to aid the ingress and retention of water during the cooking process
Curing meats involves higher concentrations of salts to osmotically draw moisture out of the meat making the resulting dry meat a less hospitable place for bacteria to grow.
In short, brining is about adding moisture for juiciness, curing is about drying meat out for preservation.
Note: When curing meats one can use both dry and wet cures. A wet cure is still a liquid containing salt and therefore will be referred to as a brine.
Nitrate or Nitrite - Why Add It & What's The Difference?
Whether you make your own curing salts or buy commercially prepared salts, a common ingredient will be either sodium nitrate or sodium nitrite, or (in the case of fermented sausage) both. So why do we add them and what's the difference?
- Nitrite is the chemical that turns cured meat such as ham or bacon pink. It gives the reddish colour to corned beef and jerky. If we didn't add nitrite then all these meats would be grey / brown.
- Nitrite also (to many people) is pleasant to taste. There's no other way to describe this other than to say that ham or bacon without nitrite would just taste like roast pork when cooked.
- Nitrate is a bacterial inhibitor (Clostridium botulinum) protecting us against botulism, a form of food poisoning which can be fatal. C botulinum spores are everywhere including in the human gut but the the toxin (botulin) is only formed when the spores reproduce which only happens when certain conditions occur simultaneously.
Conditions include:
- An airtight environment
- A certain temperature range (between 8°C - 63°C)
- A non acidic environment
- A time period long enough for reproduction
Note: Point 1 is worthy of further mention. You may have believed vacuum packing to be a good method of food preservation, well actually that point is open to debate.
Sodium Nitrate
Sodium Nitrate also known as saltpetre (or saltpeter) is naturally occurring in many salts and therefore was "the original" bacterial inhibitor although it still remains the case that it is is the oxidised derivative (nitrite) that actually inhibits bactrial growth and turns cured meats pink.
Curing meats in the days before refrigeration involved the addition of saltpetre and storage at cool temperatures that were higher than that of today's refrigeration. At these temperatures "good bacteria" propagate in the meat and convert the nitrate into nitrite.
Thus with the refrigeration techniques of today, the process of curing meats need only require sodium nitrite. That said, I prefer the traditional way.
Nitrites And Health
Nitrite is highly toxic if ingested in sufficiently large quantities, a lethal dose in humans is approximately 22 milligrams per Kg of body weight. Whilst is is unlikely that one would accidentally consume that much nitrite it does make the use of nitrite a serious business.
In addition, the amount of nitrite that one needs to add when curing meats at home is probably no more than the tip of a teaspoon which is a pretty subjective measurement that is difficult to measure out accurately and consistently.
The way to add nitrite accurately and safely (which I use in my sausage recipes) is to make up a curing powder and there is a standard known as Prague Powder #1 or Cure #1. This is a mix of 93.75g salt and 6.25g nitrite which you can add by the teaspoon or as directed and ensure that you are only adding a small percentage of nitrite to your final cure.
There are commercially made curing powders such as Instacure #1 or Mastercure which contain this same mix together with anti caking agents and a little red dye (so that you can't mistake the powder for pure salt).
When
it comes to using curing salts in sausage or small quantities of meat
then I prefer to use Prague Powder #1, it's only if I were curing a
large quantity that I would directly add saltpetre. In the recipes below I will add saltpetre directly.
Cancer
You may well have read or been told about the possible risks of cancer from eating processed meat. In many cases it is nitrite that is believed to be the culprit.
During the cooking process, nitrites react with the breakdown products of amino acids to form nitrosamines which are known to be a cause of cancer.
My understanding is that this evidence is pretty clear cut. It's also led to a rise is bacon and ham products claiming to contain no added nitrite which is potentially misleading because these products usually contain vegetable extracts that are rich in nitrites (eg. celery or beetroot).
There is a counter-argument citing that vegetables are rich in nitrates yet they don't cause cancer but it is believed that the vitamin C content in these vegetables prevents the formation of the cancer causing nitrosamines. I've only laid out the bare bones of this argument here, if you'd like to learn more then use this link, but suffice to say, there's nothing positive that can be said for eating cured meats so since writing this article, I've cut down my consumption quite considerably.
How To Make Prague Powder #1
Commercial curing powder #1 contains an anti caking agent that ensures a consistent mix of salt and nitrite in the cure. If you choose to make your own then you run the risk of a small inconsistency, I've made my own Prague Powder #1 and never found it to be a problem.
You need scales accurate to 1g and then the mix is as follows:
- 375g sea salt
- 25g sodium nitrite
Store in an airtight plastic container.
Choosing Your Meat
Young pork contains more water than old pork and old pork has more fat so the best meat to use is that from a pig that is more than one year old. A pig that goes into the bacon processing industry is normally used in the following way:
- Shoulder - Ham
- Middle - Back (rib) and streaky (belly) bacon
- Leg - Gammon
- Cheek - Guanciale (an Italian bacon traditionally used in Spaghetti Alla Carbonara
Rind on or rind off? It's your preference
Curing Meats - 4 Ways
I've tried all four ways and found them all to deliver excellent results but I've found two of the four more practical for home curing meats.
Vacuum Curing
This is probably the most modern method and you need a vacuum packing machine. Basically you dry cure the meat (directly apply the curing ingredients to the meat) and then place the meat in a vacuum sealed bag so that the meat bathes in the liquid which has been osmotically drawn out of it. I recommend this method because it's clean and tidy, product is easy to store in the refrigerator, easy to overhaul and there is no mess. The ideal temperature for vacuum curing is between 2°C - 4°C (35°F - 40°F). The downside of course is that you have to run to the expense of a vacuum sealing machine.
Wet Curing Meats
Wet curing involves adding the curing ingredients to water to make a brine in which the meat is placed to soak for a period of time. You need a good sized container (made out of plastic or stainless steel) approximately twice the size of the ingredients that you wish to cure because the brine will rise up when the meat is added.
The brine should be made up by boiling all the water necessary for the brine and adding the curing ingredients so that everything dissolves. Once done, the brine can then be left to cool for 24 hours and then chilled in the refrigerator prior to adding your meat. The ideal temperature for wet curing is between 2°C - 4°C (35°F - 40°F).
The upside to wet curing meats is that the distribution of the cure is even in brine but on the downside you need significantly more refrigerator space for the same amount of meat compared to vacuum curing.
Note: It's always better to refrigerate your pork at the same time as the brine prior to curing, that way everything is at the same temperature when you start.
With careful maintenance a brine for wet curing can be kept for months. It is essential however to remove all meat debris from the brine, measure salinity (using a brineometer) and replenish the solutes as necessary. To be honest I leave this to the professionals and make up a new brine every time.
Dry Curing Meats
The dry curing process is where the curing ingredients are massaged into the meat and then the cuts of meat are laid down compacting each other in shallow trays. 50% of the cure is used in the first instance and after a week the meat is overhauled, trays cleaned out and the remainder of the cure is applied.
This is a very traditional way and usually now applied only to cuts rather than a whole side of the animal.
Curing By Injection
This method is used by the big commercial producers as a way to penetrate the meat rapidly and therefore reduce processing time. Nowadays polyphoshates are added to the injection solution because they add weight (and therefore profit) by aiding water retention, you can tell if your bacon is produced this way because when you cook it you'll see white goo appear in the pan - the sign of poor quality bacon.
You can inject at home but achieving the consistency of cure concentration throughout the meat is difficult without expensive multiple needle injection equipment so I don't recommend it for home curing meats.
Another form of injection curing meats is artery pumping and in order to do this you need to ensure that the femoral artery remains intact during butchering. A weak concentration brine solution (approx 30 - 40% salt density) is pumped into the artery in order to disperse it through the animal's natural "distribution system".
Note however that at this stage the curing process is only half complete and must now be supplemented either by a wet cure or a dry cure.
The 5 Step Process For Curing Meats
Whichever method you choose for curing meats, the process can be broken down into five steps.
- Pickling
- Curing
- Washing
- Equalisation
- Drying
Pickling
The pickling stage is there to cleanse the meat of bone, blood and any other debris prior to curing.
To make up a pickle you need the following:
- 45 litres or 10 gallons Water
- 25Kg or 11lb Rock salt
- 100g or 4oz Saltpetre
In addition you'll need a large plastic container. Put the salt into the water and mix well. Dissolve the saltpetre in a little water (you may need to heat it up) and when dissolved, pour it into the pickle and then refrigerate everything for 24 hours.
Note: Use an old saucepan to heat up the saltpetre solution then dedicate the saucepan to this job so that you avoid any possibility of cross-contamination.
Pickle your pork cuts in the solution as follows:
- 60 minutes for shoulders and hams
- 30 minutes for back bacon
- 10 minutes for streaky and cheeks
Curing
First of all choose your preferred method for curing meats and then use any of my cure recipes below. As you develop your skills you may want to develop your own recipes and you may also have your own tastes in terms of the flavour intensities that you want to achieve.
To that end, I'll just give you my two rules of thumb:-
- Apply 100g of dry cure to every 1Kg of meat
- The time for curing meats is approximately 1 week for every 1" thickness of meat. (1 day for every 500g is also a good starting point)
Washing
At the end of the curing time it is important to wash the meat of any remaining cure otherwise you'll find that when you hang it to dry the salt crystals will attract moisture and mold will grow on your bacon.
Equalisation
Equalisation is the process by which the salt and saltpetre slowly work their way through the meat to achieve an even distribution.
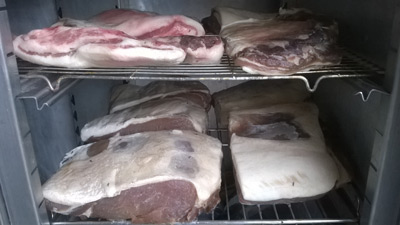
Place the washed bacons / hams on wire trays in a fridge so that air is free to circulate around the meat.
The equalisation process itself will take about 12 days so I allow my
bacon for at least 14 days to be safe.
Drying
The most important part and the one that most commercial producers avoid because the drying process reduces profit.
The drying process requires air circulation so a domestic fridge is not ideal. A commercial fridge with a fan is much better but a significantly bigger investment and significantly higher running costs. If you haven't got suitable refrigeration equipment then you may be restricted to curing meats through the Winter months only.
Drying best takes place at between 12°C - 17°C (50°F - 60°F) and should take at least another week, longer if your can avoid temptation.
This drying temperature may seem a little high and you may be worried if you see specks of white mold appear on the surface of your bacon...don't worry, the appearance of white "good" mold is a sign that everything is progressing well.
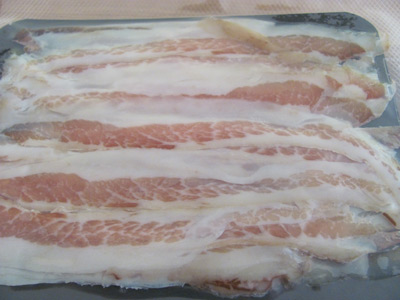
After a week it's time to test, slice your bacon and get it in the pan!
Recipes For Curing Meats
Ayrshire Bacon
- 11Kg or 25lb Salt
- 1Kg or 2,2lb Demarera sugar
- 150g or 6oz Saltpetre
- 125g or 5oz Pepper
Use as a dry cure.
Sweet Cure
This is my favourite dry cure
- 12.75Kg or 28lb Salt
- 2.75Kg or 6lb Demarera sugar
- 150g or 6oz Caraway seeds
- 150g or 6oz Saltpetre
- 100g or 4oz Black Pepper
Black pepper powder is fine, use a pestle and mortar to grind up the caraway seeds.
American Breakfast Bacon
This is a wet cure.
- 36 litres or 8 gallons water
- 7Kg or 15½lb Sea salt
- 1.8Kg or 4lb Molasses sugar
- 900g or 2lb Treacle
- 125g or 6oz Saltpetre
Once you've tried these recipes you can then start to experiment with other flavourings and ingredients. Try different types of sugars and syrups and then it's up to you how far you take it with other herbs and spices.
Air Dried Bacon with the full sweet cure treatment
Guanciale

