- Recipes Home
- Sausage Making
Making Homemade Sausage
Recipes and Tips
I started making homemade sausage a few years ago, learned the tips and tricks of the trade from countless butchers and then developed my own recipes. Use my guide and learn the steps.
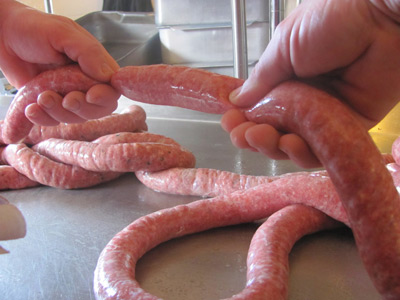
I've always been a foodie and following my passion for barbecue I've always wanted to tackle charcuterie of which I guess making homemade sausage can be counted as one discipline. Moreover it would appear that many of us barbecue enthusiasts are (just like me) fascinated by charcuterie, especially making homemade sausage and home cured bacon.
For my part I started out making sausage at home for my own consumption and once perfected I swiftly moved on to commercially making homemade sausage for my barbecue catering business and that's still the case today.
Following excellent feedback from many of my catering customers I also tried to sell my sausage commercially. This proved not to be financially viable because most people buy sausage when visiting their local butcher rather than from a dedicated sausage maker like me. Well you live and you learn.
Now however I'm lucky enough to have all the necessary equipment and skills to make all sorts of sausage. The equipment is exclusively for me and my bbq catering business but my experience of making homemade sausage is free to share.
Sausage History
Sausage making is pretty much as old as the hills. The word itself is derived from the Latin salsus meaning "seasoned with salt" so that puts us at least 2000 years ago.
Just as the smoking of meats came about as a method of preservation, the same can be said for applying salt to meat. When animals were slaughtered and the meat salted for preservation it was found that the cleaned out intestines, bladder and stomachs of the animal made excellent containers. No doubt it's this same evolution of discovery that led to Haggis.
Far from being Scottish however it is believed that the first sausage makers were Sumarians living in what is now called Iraq sometime around 3000BC. That said the first historical documentation of sausage comes around 500BC in China and also in ancient Greece.
From there it's been a steady evolution to what we see today. Sausage making in hot dry climates has given us dry cured sausage and salamis and all over the world sausage is made and prized for varieties using local seasonings.
Sausage Making Equipment
There are two essential (and one optional) pieces of equipment that you need for making homemade sausage:
- A Grinder - this is the machine which pulverizes the meat
- Food mixer - to mix the meat and the other ingredients, this is optional and can be done by hand
- A Stuffer - the machine which forces the prepared sausage into the casing
I started out with a food processor to chop the meat and a very small "sausage making machine" like the one in the picture below... what a disaster.
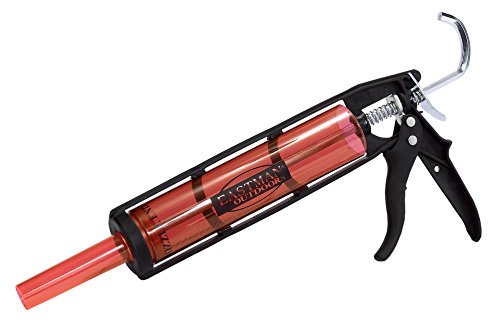 Making homemade sausage with this type of stuffer is a nightmare
The food processor cut the meat too fine which meant that the final sausage was too dense and the "sausage making machine" wasn't really fit for purpose. If you're serious about making homemade sausage in the long term then it pays to invest in some proper equipment. You don't have to spend the Earth but getting it right first time can save you a lot of time, money and frustration.
Having decided to invest the next question to ask is how much sausage do you intend to make and how often? I quickly graduated to a hand grinder and a Trespade stuffer.
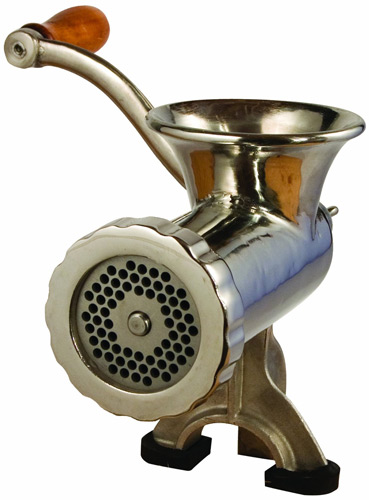 Meat Grinder
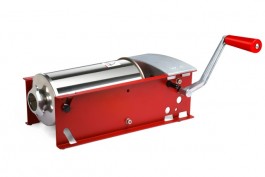 Trespade sausage stuffer
Grinder
Depending on the type of sausage you plan to make you will want to vary how coarse you grind your meat. Over and above sausage meat sold in the supermarket, it also allows you to vary the fat content of your sausage so a grinder is essential and not too expensive to buy.
All meat grinders work the same way. Diced pieces of meat are added to the hopper and drop down into the barrel where an auger forces the meat across a rotating blade and out through the holes in the back plate. The aperture of the back plate holes determines how coarse a grind you make so your grinder should come with at least three plates - 4mm, 6mm & 9mm will give you a good spread.
A manual grinder is perfectly good enough, buy one with a table clamp as opposed to one which sticks to the worktop with sucker cups. For ease and speed then an electric grinder wins on speed, convenience and clean up (it won't win on noise), especially if you are making homemade sausage frequently.
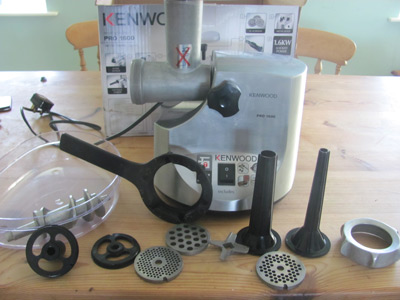 My first electric grinder. Noisy but worked well.
You can buy electric grinders that also have stuffer attachments. I
don't like these because I like more control over the stuffing process
and so prefer to have a separate stuffer.
To prepare your meat and fat for grinding, cut it up into 1" - 2" cubes. Put the fat through at the same time as the meat and this makes everything go through a lot easier.
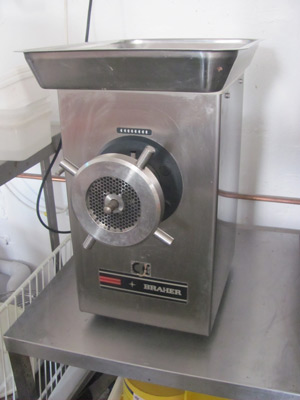 A commercial meat grinder takes volume production to another level.
I also grind my meat twice, the first cut I use the 6mm plate and after mixing I run the sausage meat through again using the 4mm plate once the seasoning has been added.
Food Mixer
An important step that I will talk about later in this article is the mixing of the meat with the seasoning to help release a binding protein called myosin. This mixing process can be done by hand but it's a darn sight less strenuous if done in a food mixer. I use a mixing bowl and a dough hook because generally the mix is too thick for a beater.
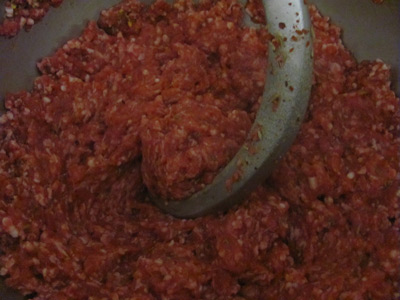 It's optional but an electric food mixer takes a lot of effort out of making homemade sausage
Note: A powerful food mixer is an essential piece of kit for making frankfurters and this will be covered in the emulsified sausage section below.
Sausage Stuffers
As I said previously, my first sausage stuffer was a disaster and frankly should be considered no more than a child's toy.
My second purchase was horizontal barrel stuffer which I found to be robust, reliable and perfectly adequate for home use. Like the grinder, this type of stuffer comes with table clamps however note that you have to clamp it to the end of the table otherwise you can't turn the crank handle.
As you grow you might want to consider a vertical barrel stuffer. These work pretty well to and hold a larger batch quantity of sausage meat. You can therefore make more sausage before having to refill the barrel but there are a couple of points to take care of:
- A larger barrel means more waste because there's always a residue of sausage meat left in the stuffer.
- Take a close look at the mechanics and you'll see that the piston isn't driven directly by turning the handle, there is a gear in there. If this gear is made of plastic then excessive force will break the gear.
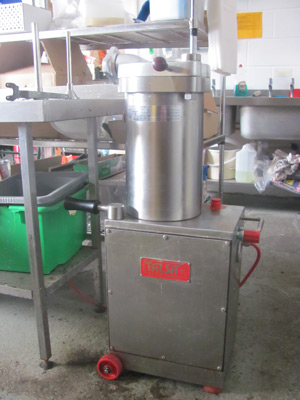
It's for these reasons that I prefer to use the direct drive horizontal
stuffer for home use and just accept that I have to refill the barrel a
couple of times.
I then moved onto a commercial electric stuffer. Not only is it larger and quicker, the drive of the piston is operated by your knee leaving you both hands free to control the stuffing. These babies are expensive but wholeheartedly recommended if you are preparing 10kg (20lb) or more in a batch.
Casings
Most homemade sausages are prepared using natural casings, in other words the cleaned small intestine of the animal.The inner intestinal lining is removed and so is any muscle fibre from the outside. Natural sausage casings are then graded according to diameter.
The advantage of natural sausage casings is that they are relatively easy to come by, they are easier to link and (if making a dry cured sausage) shrink at the same rate as the sausage meat as they hang to dry. A hank of casings is usually enough to stuff 45Kg (100lb) of sausage.
Most casings are supplied as a "hank", threaded and knotted through a coloured ring (which identifies the size) and then bagged with dry salt and refrigerator stored. When you open the bag, firstly untie the knot around the ring and then start to separate the lengths.
There are other options to natural sausage casings however this is where we'll concentrate as this probably covers 99% of most needs for making homemade sausage.
Hog
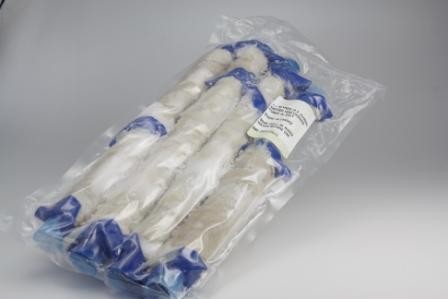
Hog casings (from the pig) usually come in four size options:
- 29 - 32mm
- 32 - 35mm
- 35 - 38mm
- 38 - 42mm
In short, a relatively wide diameter casing for larger sausages (such as Cumberland). The main advantage of hog casings is that they are relatively cheap and easy to link without breaking however the downside is that the casing texture can be described as a little chewy.
Sheep
Smaller in diameter than hog and more tender, dependent on size a hank of sheep casings will be 2 to 3 times more expensive than hog. Being more tender on the palate also means that they are more prone to splitting during stuffing and linking. The size range is typically:
- 20 - 22mm
- 22 - 24mm
- 24 - 26mm
- 26 - 28mm
Beef
Used in my homeland for black pudding links. Too tough to be considered edible by my standards.
Collagen
Collagen is the protein extracted from beef bone and connective tissue and is the same as that used to make gelatine.
Because they are formed they come in a variety of sizes and are sold dry, they are more expensive than the wet casings above but because of the ease of use they have become popular in automated mass production.
To prepare, soak the casings in oil for 24 hours before threading onto the stuffer nozzle.
They are tender when cooked and tough in raw form making stuffing easy but I find them very difficult to link (traditionally) without breaking because they don't have the flexibility. That said and speaking as a caterer the collagen casing doesn't bend and this makes cooking large quantities on my charcoal grill a little easier.
In summary, fine for the commercial sausage makers but I don't recommend for making homemade sausage.
Muslin
You'll find muslin casings used for some salamis. For the purposes of this article I'm not going to discuss them further at this stage.
Preparation Of Hog & Sheep Casings
For the reasons stated above most people making homemade sausage will use either hog or sheep casings.
Take the number of casings that you require. 1 Kg (2.2lbs) of sausage meat will require approximately:
- 2 metres of sheep casing
- 1 metre of wide diameter hog casing
Take a bit more casing than you think you will need because any leftovers casings can be covered in dry salt and refrigerated. That way they can be kept indefinitely.
To prepare the casings soak them in cold water to rinse off the salt, change the water a couple of times. Open the end of the casing (blowing into it makes this easier) and submerge so that you get water inside the casing and let it flow through to rinse any salt out. Finally soak for 30 mins in lukewarm water - this softens the casing and makes it easier to thread onto the stuffer nozzle.
Note 1: A professional may advise using cold water for health and safety reasons but then they apply the "do as I say and not as I do" rule.
Note 2: Some will recommend soaking the casing in water with a splash of vinegar overnight. The addition of vinegar certainly makes the casing more puffy and supposedly makes for a more tender eating experience but I don't do it for 2 reasons:
- The puffy casing is more difficult to thread onto the stuffer nozzle
- Any unused casing prepared this way must the thrown away because the vinegar fundamentally changes the structure of the casing.
Threading the casing onto the nozzle
Firstly ensure that you fit the appropriate size nozzle to your stuffer dependent on which casing you are using.
As when rinsing the casing, open the end and dip it into the water, this will make the casing easier to thread onto the nozzle.
Coat the nozzle with water and then thread the casing onto the nozzle. If the casing fails to slide onto the nozzle, grab the other end and hold it up so that any water in the casing slides down to the nozzle, you should no find the threading somewhat easier.
Always put the casing on the nozzle before fulling the stuffer to ensure that the sausage meat is given no opportunity to warm up.
Meat Fat Ratio
There is no one size fits all answer to this question other than to say that there has to be some fat in there. If you're making homemade sausage so that you can reduce the fat content then great but it's worth noting that the more fat you take out, the more solid the sausage will be when you have cooked it.
You have to have fat in the recipe because this is where a lot of the flavour is. As the sausage is heated up, the fat renders (melts) and the meat is cooked in the fat. This is the reason why you don't prick a sausage before cooking it - use this link for more of my sausage grilling tips.
I think that optimum mix is approximately 70% lean meat : 30% fat. It can be roughly achieved by a 50:50 mix of pork belly and shoulder.
To be more consistent from one batch to the next you can achieve this mix ration using my basic breakfast sausage recipe:
- 6 Kg pork trim (shoulder off-cuts)
- 1.2 Kg fat
- 1 Kg rusk (breadcrumb)
- 2 Kg water
- Seasoning
Note: You don't have to add rusk, it depends on the type of sausage that you are making. For gluten allergy sufferers you can replace the rusk directly with soy protein (also known as textured vegetable protein or TVP), potato flake or leave it out altogether.
A Quality Sausage Doesn't Need Expensive Meat
Now's the time to get a few things off my chest and cut through the marketing drivel that you see from sausage makers.
"We only use the prime cuts of meat" - The fundamental reason for the sausage was to use up the remains of the carcass so that there was no waste following slaughter. Moreover, you are grinding up the meat so selecting the more tender cuts of the animal is irrelevant.
- Pork - Shoulder, belly and head trim are fine
- Beef - Chuck or Flank
- Lamb - Neck fillet, mutton
- Chicken - Leg including the skin
"Made From The Finest Rare Breed Pigs" - Now I'm not going to deny that rare breed pork is succulent, tender and with a better defined fat marble in the meat and that's fine and dandy if you're eating a pork chop or steak...but this is sausage. We're adding seasoning for flavour and we're controlling the meat / fat ratio ourselves. Rare bread pigs are more expensive to rear (that's why they are rare) there's no need to use them for making homemade sausage.
Fat
Sausage needs a fat content so get over it. Fat plays an important part in the science of both making and cooking sausage, fat is important for the flavour, fat is important for the juiciness. If you want a sausage with half the fat of a regular sausage, just eat half the quantity.
Yes I will give you some low fat sausage recipes but in my book they are still the poor relation to a good quality homemade sausage.
That said, making homemade sausage gives you the choice over what fat to use. For example, if making sausage using poultry you might want to add pork fat because it has a higher melting point than poultry fat which is important when it comes to cooking. Likewise game fat isn't to everyone's taste and there is precious little of it on game meat anyway so the addition of pork fat is advisable.
Seasoning
Making homemade sausage and not using your own seasoning recipes would be a travesty in my book.
Making your own seasoning is rewarding because you can eliminate all the nasties that are put into commercial sausage seasonings:
- Carmine – a pink colouring that gives the impression of a higher meat content
- Maltodextrin – a binding
agent that gives that rubbery texture to many sausages. (Coeliacs should
take care because maltodextrin can be derived from wheat or barley)
- Stabiliser (E451) – these phosphate salts help
emulsify fat and also aids water retention therefore making the
sausage heavier and more profitable. It also dilutes the flavour so not relevant when making homemade sausage
- Flavour enhancer (E621) – Monosodium
glutamate, it's only needed because of the amount of water added above
- Antioxidants E304i & E307 – added to extend the shelf life of the product
- Preservative (E221)
All the seasonings recipes that I have developed contain no preservative of colouring so there are a couple of points to note:
- A shop bought sausage will typically have a shelf life date 5 days hence because it contains preservative. If you're making homemade sausage without preservative then use the freshest of meat (and fat) and consume within 3 days or freeze
- The lack of colouring will mean that your sausage will start to turn grey after a couple of days in the refrigerator, this is natural and nothing to worry about.
Finally always use fresh fat, old fat will look OK and will be safe to put in your sausage but it will give the sausage a bitter after-taste.
The Mixing Process
All meat used for sausage should be fresh and well chilled prior to grinding and subsequently refrigerated during each stage. Once you have finished grinding, place the meat back in the refrigerator while doing the washing up.
The mixing isn't just about getting all the ingredients equally distributed, this is the difference between a moist sausage and a dry sausage.
Critical to successfully making homemade sausage is the order in which the ingredients are mixed, for how long they are mixed and at what temperature. You'll notice that most recipes call for an amount of water or liquid and it's vital that the seasonings are mixed into the liquid prior to being added to the sausage. By doing it this way you ensure that the seasoning is evenly distributed throughout the mix.
In addition the liquid is needed to penetrate the meat cells & carry in the salt which is responsible for both texture, preservation and the release of the myosin protein. Having the salt already in solution means that it can enter the meat cells quickly.
Note: Some will tell you not to add water and to be fair there are a few recipes that don't need water but I always recommend that you use water.
Myosin is a binding protein, (like gluten in bread)
it helps bind & gives texture to the sausage and it also acts as an emulsifier (binding liquid and fat together). When you extract enough myosin it will bind with liquid that you've added thus helping to retain it, in addition your liquid also disperses the myosin,
allowing it to form a matrix structure that traps fat particles, preventing them from being leached from the sausage meat
mix when it's cooked.
You'll know when myosin is being released because the sausage mix will turn gloopy as you mix it. It may take some time but once you've reached that gloopy stage you can add rusk or another filler if you wish.
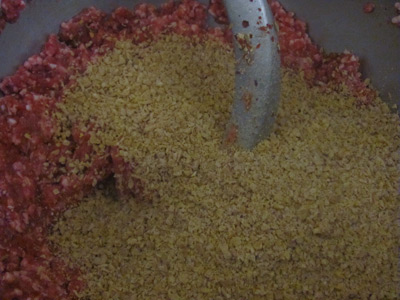 Making homemade sausage with added rusk
Mix either by hand or using a food mixer, don't try to use a wooden spoon because this is seriously hard work. If you are mixing by hand then get a pair on insulated rubber gloves so that your hands don't get cold.
It's also important to ensure that the mix temperature doesn't rise beyond 8ºC (46ºF) for poultry, 12ºC (53ºF) for pork, and 18ºC (64ºF) for beef, the melting point of the respective fats. As the melting point of the fat is reached, the protein bond around the individual globules begins to rupture, so causing loss of both fat and water during cooking.
Note: Phosphate salts, (sodium tripolyphoshate or tetrasodium pyrophosphate also referred to as stabiliser E451) will be used by the professionals because these salts take the guesswork out of myosin extraction. I don't like to use them but if you're looking to mimic that spongy texture that you get with a commercially produced sausage then this is the chemical that does it.
Now you're ready to stuff your sausage meat into the casing.
Emulsified Sausage
I've written much above about how critical it is to get a good emulsification to ensure that you have a moist juicy sausage but in addition to the regular fresh sausage there's a range of sausages to be made that are exclusively classed as "emulsified sausage".
These sausages have a less visible ground meat content and if I give you some of the names of the most common emulsified sausages then you'll probably understand the texture:
- Baloney
- Mortadella
- Regular Frankfurter, Wiener or Wienie (hot dog sausage)
Making homemade sausage like these definitely requires a food processor and strict temperature control for the mixing phase ( and even applying these rules we'll still find the end result different to a commercially emulsified sausage) so before moving onto the stuffing process I'll now describe how to make emulsified sausage.
I have a number of emulsified homemade sausage recipes in this section:
The process involves adding ice to super chilled meat and mixing until a paste is produced followed by the addition of ice. To get the right consistency however will require a powerful food processor, it doesn't need to be of a professional standard but the emulsification process puts a lot of strain on the motor so it needs to be up to the job.
Emulsification (adding the crushed ice) not only lowers the temperature of the meat, it also adds more fluid and air (which is whipped in by the powerful food processor) and so the volume of finished product is about 150% that of a regular sausage.
How To Emulsify Homemade Sausage
The single most important factor in the emulsification of sausage is to ensure that the temperature of the sausage meat does not exceed 15°C (59°F) and you can use your instant read temperature probe to keep this under control. The best place to start is with your equipment chilled in the refrigerator and your mix of sausage meat and seasoning in the freezer just that that slightly crunchy semi-frozen state.
Prepare 240ml (1 cup) of crushed ice (slush) by blitzing a tray of ice cubes in the food processor. Place this in the refrigerator.
Dependent on the size of your food mixer you may need to do this next process in two halves.
Place the ground meat in the mixing bowl and add the crushed ice and then mix for 30 seconds. Check the temperature.
Continue this process of 30 second mix followed by a temperature check until the temperature reaches 4°C or 39°F. When you reach this temperature reduce the mixing time to 15 seconds with 15 second intervals to check the temperature.
You can stop mixing when either when you have a good
emulsification or the temperature reaches 12°C or 54°F, whichever comes
first.
Note: You can tell when you have a good emulsification because the meat mix will have a glossy sheen and the paste appearance of a soft ice cream.
When you have reached this stage, don't "over-emulsify" just return it to the refrigerator while you get the stuffer ready.
Stuffing
This next section applies whether you have an emulsified or regular sausage.
Pack the sausage meat a little at a time into the barrel of your sausage stuffer and then use your fist to punch out any air. If you fail to do this you'll end up with air pockets inside your links, you can prick with a pin but then you'll find the link only partially filled.
Crank your sausage stuffer gently until meat appears at the end of the nozzle and just cut this away to leave the meat flush with the nozzle tip. Now slide about 25mm (1 inch) of casing off the end of the nozzle and start to crank the stuffer again. Keep your hand cupped under the nozzle and use your thumb and forefinger to tension the casing to ensure that the casing comes off the nozzle tip gradually and not in one lump.
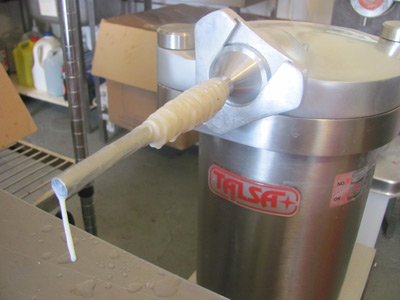
You'll find that this hand is kept very busy when making homemade sausage, using a professional stuffer with knee operated control gives you two hands free but this really is a giant step up both in volume and financial outlay. If you're struggling then your best bet is to hire a second pair of hands.
Wastage
When you've finished making a batch of sausage there's always going to be some sausage meat left over in the barrel of the stuffer. The amount left over is always the same whether you have filled the stuffer once, three times or ten times so clearly it's more economic to make larger batches and freeze if you can.
The other point to make is that the larger the barrel of your stuffer, the more wastage there will be...but all is not lost.
There are two options for using this wastage:
Break out the burger press, dependent on whether you have used rusk or another filler in your seasoning mix, the texture will be different but the flavour is still there. Fry an egg sunny side up, lay it on top and you've got a tasty breakfast burger patty.
Vac pack the overflow and freeze it. Wait until you've got a few packs in the freezer, defrost and then make more sausage. You can't re-freeze so you must cook and eat this sausage within a few days but if you're planning a BBQ party then this is a great way to use up all your excess. I've even mixed batches with different seasonings into the stuffer and made a variety batch!
Making Homemade Sausage Links
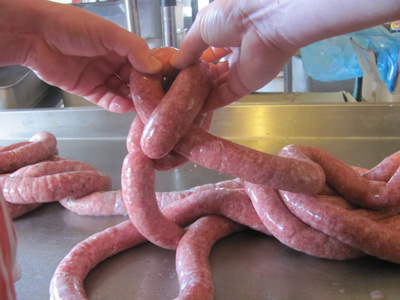
I've tried to figure this out watching videos or following instruction but it's like learning to tie a tie when face to face with the person who's demonstrating so I've written a new article how to link sausage with pictures taken from in front of me so I hope that it helps.
Storage
Making homemade sausage as described above contains no preservative so you should eat your fresh sausage within three days or freeze.
Because you've added water to the sausage mix (and dependent on the amount of filler added) you may find that some water leeches out of the skins. Store your sausage in the refrigerator in a deep sided tray / bowl with paper towel top and bottom and this will soak up any excess water so you don't find it all over the bottom of the refrigerator.
Seasoning Recipes For Making Homemade Sausage
Cumberland Sausage Ring
Making Polish Sausage
Homemade Breakfast Sausage Recipe
Homemade Venison Sausage
Creole Chaurice Sausage
Little Wienies
Chicken Wieners
Homemade Bockwurst Sausage
Bratwurst Sausage Recipes
Homemade Knockwurst Sausage Recipe (Emulsified)
Italian Fennel Sausage
Chicken Tikka Massala Sausage
Spanish Chorizo Sausage Recipe
Homemade Summer Sausage
Scottish Lorne Sausage
New Orleans Sausage (Smoked and Cajun spiced)
See Also:-
Making Homemade Sausage Links
Smoking Homemade Sausage
How To Cook Sausage
External Links

Return to Recipes Home from Tips For Making Homemade Sausage
Charcoal Grills
Stainless Steel Inserts For a Brick BBQ Grill
Adjustable Height Charcoal Grills
Custom Built To Your Specification
Replacement Stainless Steel Cooking Grates
Smokers
Please Help
Keep This Site Free!
Many Amazon merchants pay us a small referral fee when you click this link and purchase from them...
It makes no difference to the price you pay but it really helps me continue improving this website. If you like what I'm doing then save this link and use it every time you go to Amazon. For whatever you purchase through this link (it doesn't have to be barbecue) I heartily thank you in advance.
