- Recipes Home
- Pork
- Pulled Pork Recipes
Pulled Pork Recipes And Tips
This is the essential guide for pulled pork recipes and tips. Read through, practice and then read through again, that way you'll get close to competition quality barbecue in the shortest possible time.
Before we go there though, I still get many folks coming up to my barbecue catering stand when I'm serving and asking "what is pulled pork?" Click here for a quick explanation.
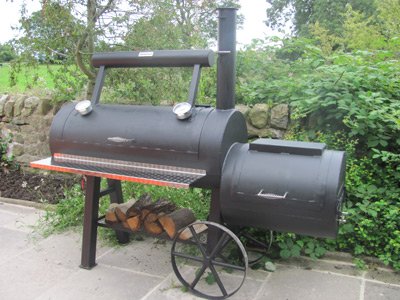
Technically you don't need to use a
smoker to make pulled pork, you can do it in the oven or even in a
crock pot (slow cooker), all my pulled pork recipes are on this page but hot
smoking is still (for me) the way forward. The barbecue smoker adds
so much flavor, colours the meat with a pink smoke ring and really
delivers texture in the crisp outer bark.
If you do want to do it in the oven just make sure that you calibrate your oven first. Just because the dial states 225°F (110°C) doesn't mean that the actual temperature is that and remember also that the temperature will differ between the top and bottom of the oven.
Choice Of Meat
Shoulder (also referred to as the butt) is the best although you can use other cuts such as belly or even the jowl but these latter two cuts contain much more fat. The basic science behind pulled pork is that the pork shoulder is full of connective tissue which during the slow roasting process, gradually breaks down and moistens the meat. For sure there's an element of faith, you'd think that it would dry out but follow my pulled pork recipes and tips and you'll get a good result even if it's your first time.
Trim off the majority of the fat from the outside of the shoulder. Don't confuse fat with the connective tissue, it's the connective tissue that moistens the meat, not the fat so you don't need to keep your pork butt protected by loads of fat. All the extra fat will do is make the pulling process that much harder (and hotter) as you try to separate the meat from the fat at 200°F (95°C)
If you're not doing a whole pork butt,
go for the meat that's closest to the blade bone rather than the rib.
This cut has the best connective tissue whereas that closest to the
rib doesn't and therefore will be more dry when cooked. Arguably it
doesn't matter if you're going to be adding sauce but if you're only
doing a small amount, you might as well use the best bit.
Rub
The barbecue rub adds flavor and also helps create the crusty texture to the exterior of the pork butt known as the bark. You can use whatever you want but a basic mix of garlic powder, onion powder, paprika and brown sugar isn't a bad place to start.
That said, one word of warning. Some of the rub will melt with the juices as the meat cooks and an excess of sugar will make clean up that bit more effort if you're smoking the meat – solidified sugar is a pain to clean.
Your rub needs at least 30 minutes to “soak in” but the longer you give it the better. I usually leave mine overnight.
Cooking
Your smoker or oven should be set at 225°F (110°C) and it is advisable to use a remote bbq thermometer so you can monitor the temperature of the meat and the barbecue throughout the cooking. Testing with an instant read thermometer is possible but every time you open up the food chamber to test the temperature you will loose heat, this might not be such a big deal if you using a kamado as this will come back to temperature relatively quickly but other smokers might not.
You might also want to consider a fan controller (eg BBQ Guru) if using a traditional charcoal or offset smoker because it's a long cook.
At some point in the cooking the core temperature of the meat will plateau rather than continue to rise, this is referred to as “the stall” and is nothing to worry about. It usually happens when the meat temperature is around 150°F or 65°C and comes about because moisture is driven out of the meat and then condenses on the surface. Energy is required to vapourise the moisture and this transfer of energy from meat to the moisture reduces the core temperature of the meat. (It's the same principle as sweating). This cycle of moisture vapourisation can continue for a number of hours and you just need to be patient.
Wrapping In Foil
You can accelerate through “the stall” by wrapping your pork butt in heavy duty foil. It's not a cheat and in some of my pulled pork recipes I have included this step. I prefer to cook it this way for two reasons:-
- After 5 hours of smoking it's arguable whether any more smoke will significantly influence the flavour
- Wrapping in foil traps the smoky juices and at the end of the cook, these juices can be re-used
It also means that you can finish your cooking off in a traditional oven at a time convenient to you.
Wrap the butt in a double layer of foil, place it in an oven tray and pop it in the oven at 225°F (110°C or Gas Mark ½) until you hit that critical core temperature.
I have tried to further accelerate the process by increasing the temperature of the oven and it does work up to a point. Yes, your pork will reach that critical 200°F (95°C) in a shorter space of time but, when you come to pull it, be prepared to find some of that connective tissue not fully broken down and you may need to pick some of this out by hand.
I don't recommend this as a standard procedure but if you get caught short and need to have the pork on the table for a certain time then this is an acceptable “cheat”.
Pulling Pork
In many of my pulled pork recipes I refer to bear paws or meat claws, giant forks that help you pull the pork apart when it's hot. These work really well and certainly protect your hands from what is a too hot to handle temperature.
That
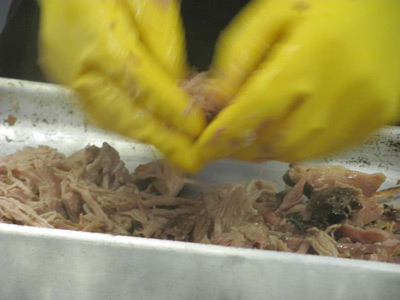
said, my preferred method is to use a pair of rubber gloves. They
won't protect you as well from the heat (hence why I'm not going to
recommend this process) but it does allow you to really feel the
texture and sift out any fragments of cartilage or bone.
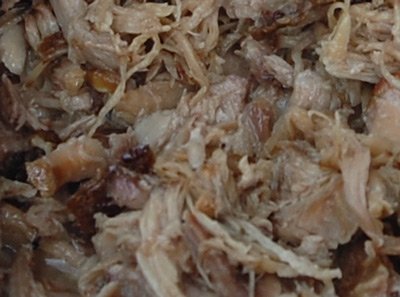
When you've pulled a couple of butts you'll start to recognise the same bones, fat layers and so on so every time you pull, you'll start to do it more efficiently. Remember to look carefully at the fat because there will be thin layers of meat in this fat and when you get to these bits they are absolutely my favorite bit and supremely succulent.
You'll
notice a lot of steam comes off when you break open the pork. It's
essential to keep of much of that in the mix as possible so I pull my
pork in a large foil lined tray so that I can wrap it up quickly once
pulled. To moisturise, throw on a little of the smoky stock and toss.
Freezing
We've got to start with that age old caveat – freezing any meat changes the texture of the end result so it's never going to be absolutely as good as fresh produce but it does come a mighty fine second and most importantly it adds convenience in that you can use your smoker economically (ie full) yet still bundle up the pork into manageable quantities for later consumption. If you follow the process above then you can freeze the pork butt or pulled pork in the following ways:-
- When you hit the stall. After
approximately 5 or 6 hours when your meat has reached a core
temperature over 65°C
(150°F), take it out of
the smoker, wrap it in a double layer of foil followed by a plastic
bag and freeze. 24 hours before you want to cook, remove it from the
plastic bag, place the foil wrapped butt in a roasting tray and
allow it to defrost in the refrigerator. When defrosted, place the
tray in the oven and turn on the heat - 225°F
(110°C or Gas Mark ½).
You'll know when you're getting close to pulling temperature when
this wonderful smoky aroma starts to fill your kitchen! Not that if using this technique it is vital that your pork has been at or above 65°C
(150°F) for at least 30 mins to ensure that it is safely cooked.
- After pulling the pork. When shredded, place the pork in plastic pots (I use ice cream tubs) and freeze. Take all the smoky stock into another tub and place it in the refrigerator until it has solidified. Scrape off the upper fat layer and discard then portion up the smoky stock (jelly) into smaller tubs and freeze. When you fancy a bit of pulled pork, break out an ice cream tub + a small pot of stock, allow it to defrost and then warm through gently in a cast iron pan or dutch oven.
You can use this second technique with any leftovers prior to freezing or indeed warming through to serve pork that you pulled earlier in the day. OK, that's it. Are you now ready for the pulled pork recipes? Try any of the pulled pork recipes below dependent on what type of equipment you have. Check your results, then read through this page again and it'll all come together sooner than you think.
Pulled Pork Recipes For The Smoker
Easy Pulled Pork - Get the right cut of pork and you won't be disappointed.
Traditional Southern Style Pulled Pork - Slow and steady, fantastic results.
Smoked Pulled Pork Recipe - No rub on this one, just a tangy mop & BBQ sauce.
Smoked Pork Shoulder - This recipe is courtesy of Colin Richards in Florida.
For The Crock Pot
Crock Pot Barbecue Pulled Pork
Pulled Pork Recipes For The Oven
Oven Pulled Pork Recipe - Following a question from one of our readers, here's some guidance.
One final point. Sometimes, and only sometimes you will come up against a pork butt that simply will not pull. Don't beat yourself up about it, it just happens and there's nothing you can do about it.

